
VACRACK
ASSEMBLY
GUIDE
Congratulations on ownership of your new and exciting VacRack. These assembly steps will outline how get it set up and running in no time.
Package Contents
Let's start by opening the package and getting all the parts ready. There's a few to keep an eye out, so make sure you have enough space available. Lay everything out so that it'll be easier to find each piece as you follow the instructions. Ideally, you'll need twice as much space as the VacRack.
Now that you've got all that sorted, let's identify all the pieces:
- 1x bottom tube (if you have ordered a king-size or larger, this tube comes in two parts)
- 4x side tubes
- 2x top tubes
- 1x pack of 8 clips
- 3x straight tube connectors (if you have ordered a king-size or larger, you will have 4 of these in total)
- 3x right angle tube connectors
- 1x t-junction tube connector with valve
- 1x rubbeer VacRack

Instructions
Once you've check and counted all the pieces, it's time to put them all together.
1
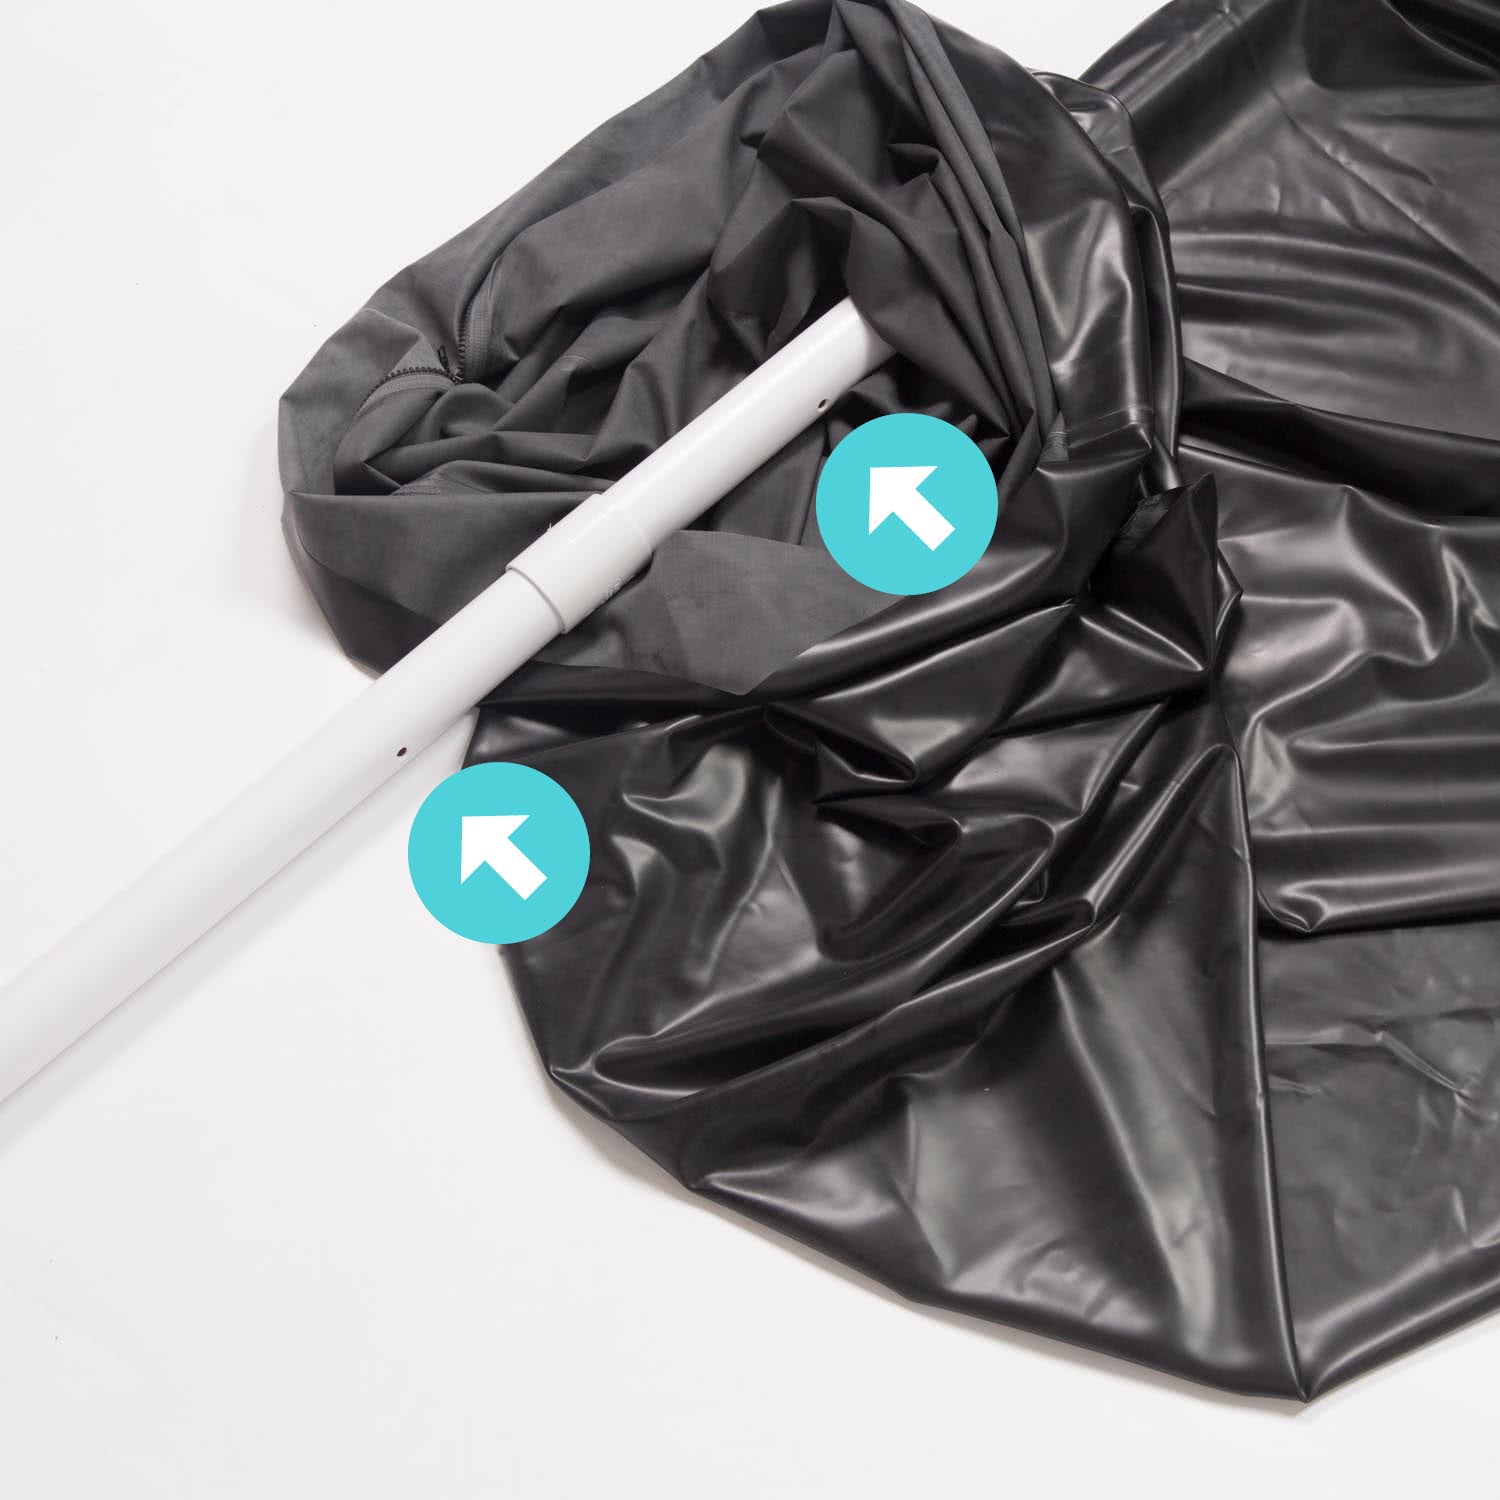
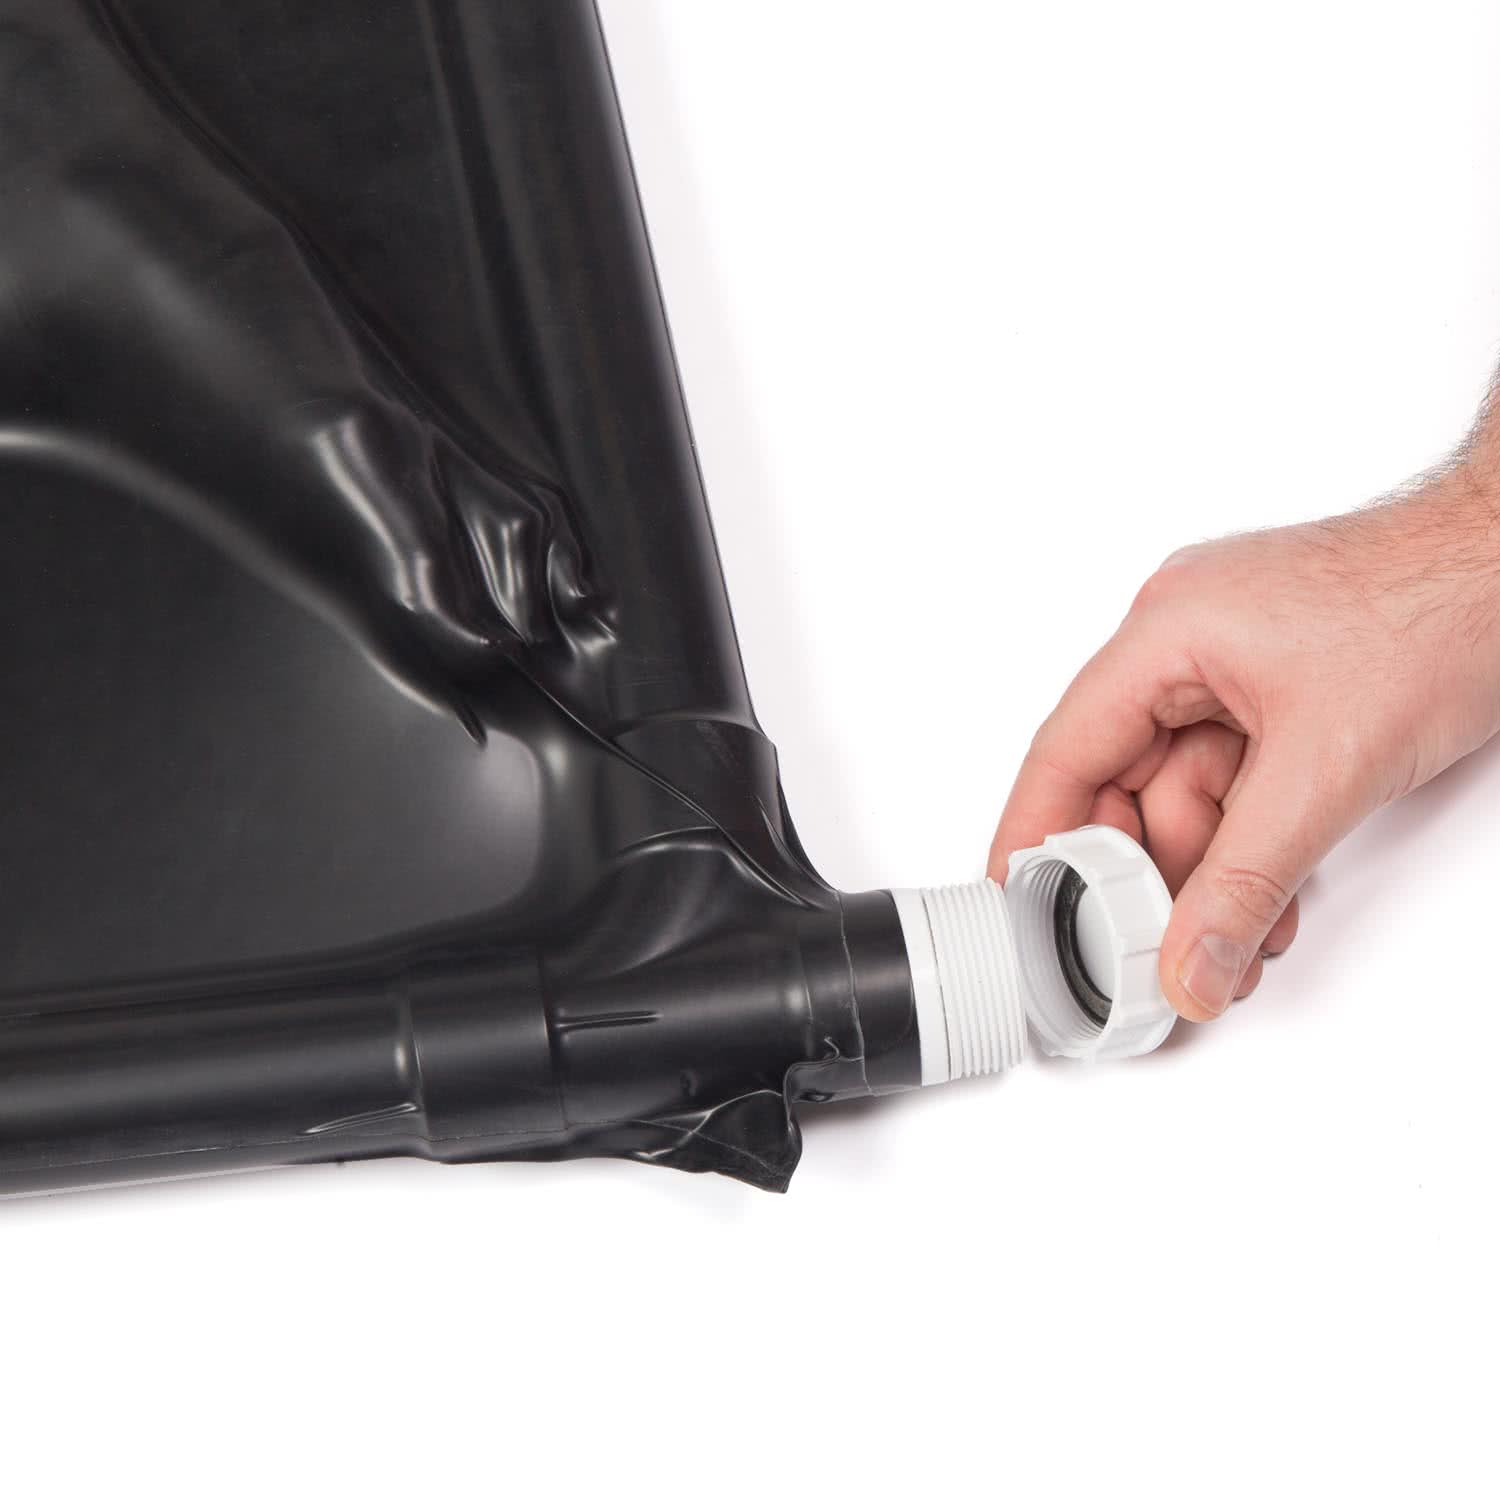
Attach a right angle connector and the t-junction valve connector to the bottom tube.

2
Insert the tube into the VacRack, making sure that the open ends of the connectors face towards the other end and that the vent holes are facing inside of the VacRack, too. The valve end of the t-junction connector has to come out through its opening at the bottom of the VacRack.


Quick note: when you’re done playing and are disassembling your VacRack, you can keep the bottom tube and connectors in place and wrap the latex around it for easy storage.

3
Take two side tubes and join them using a straight connector. When assembling, make sure that the vent holes on both halves are facing the same way.

4
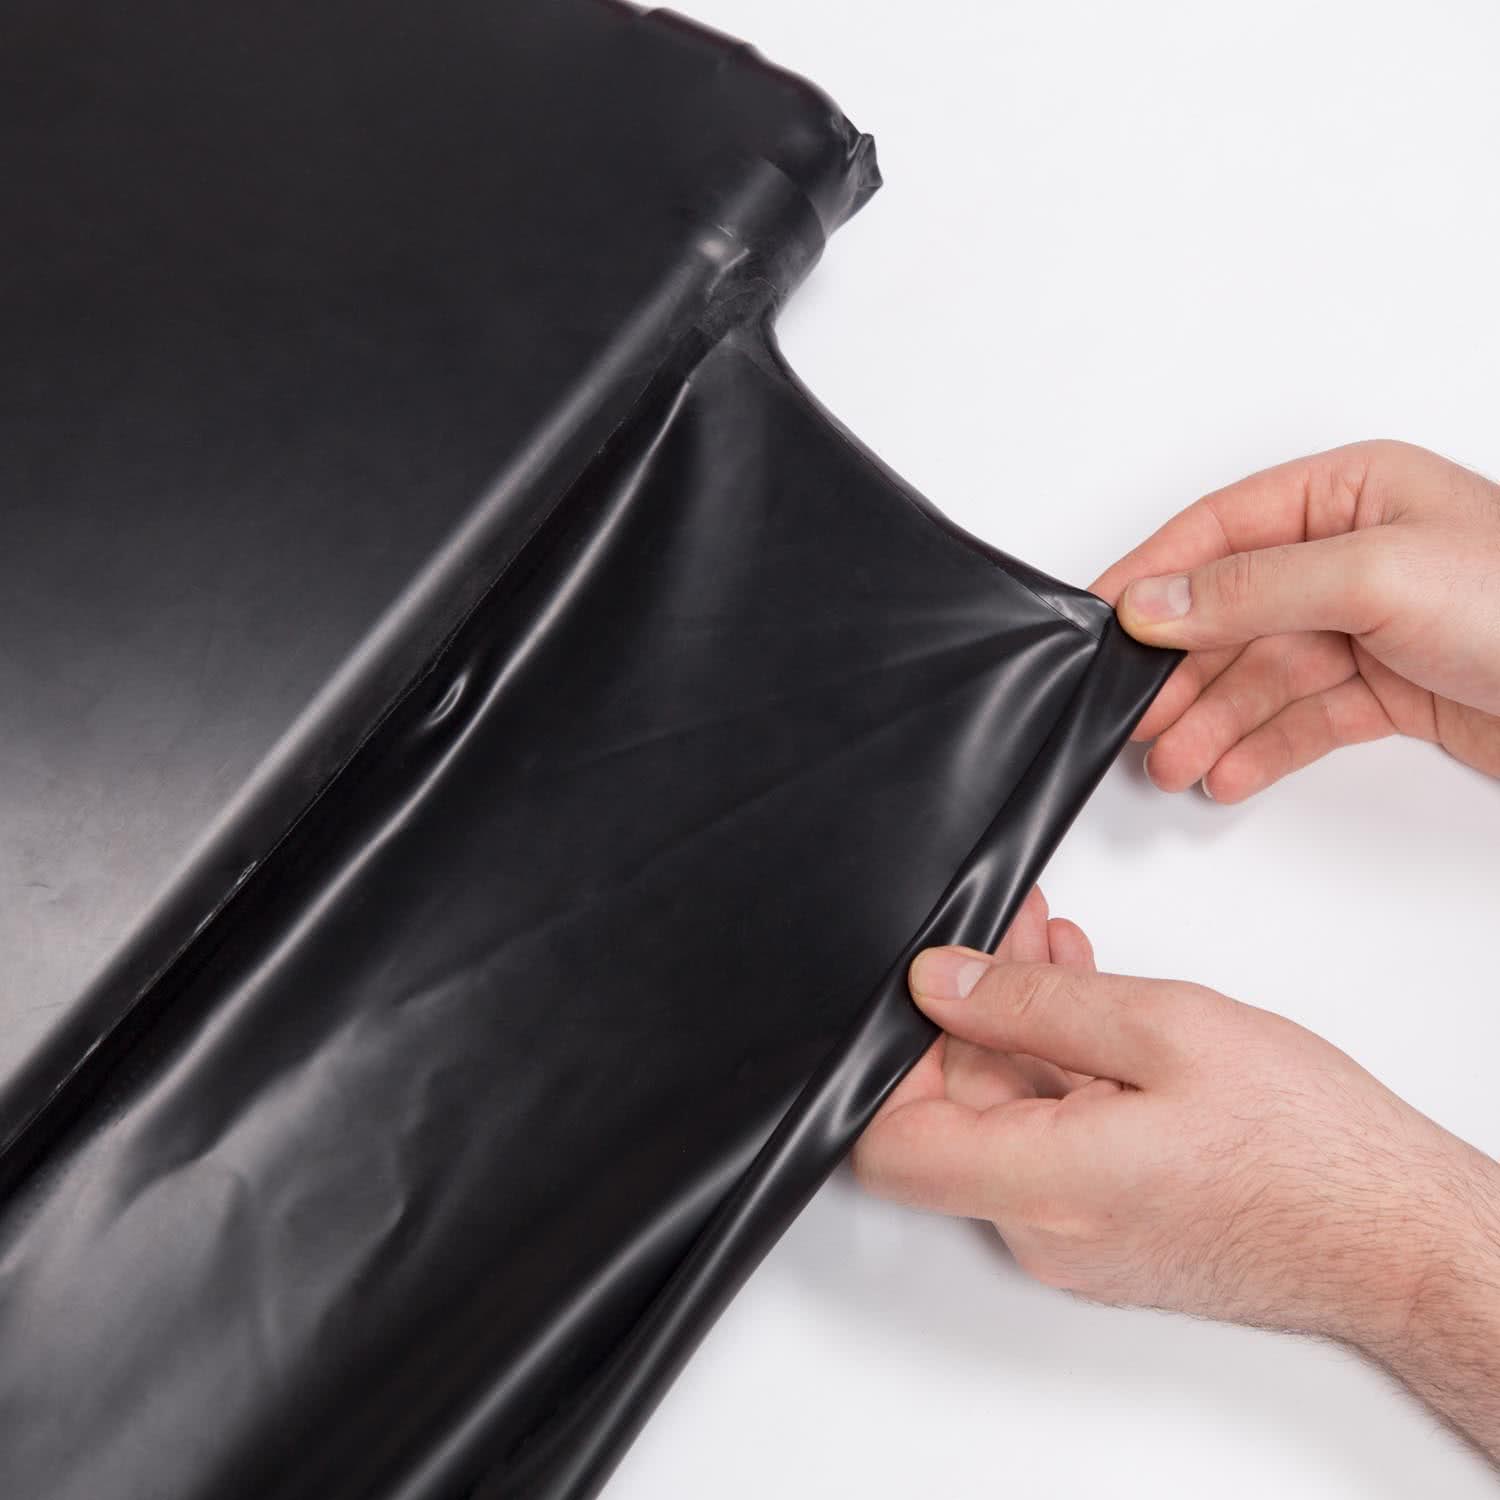
Insert the side tube into the VacRack, then into the connectors on the bottom tube. Pay attention to two things:

The vent holes need to face the inside of the VacRack
Make sure that the latex is not bunched up as you connect the side tubing to the bottom tube. Keep it wrinkle-free. If the latex is pinched in the joint, it can become damaged or pierced - so do be careful!


5
Assemble the second side tube, just as you did with the other one and insert into the VacRack, connecting it to the bottom tube too.

6
Attach corner pieces to the newly inserted side tubes.

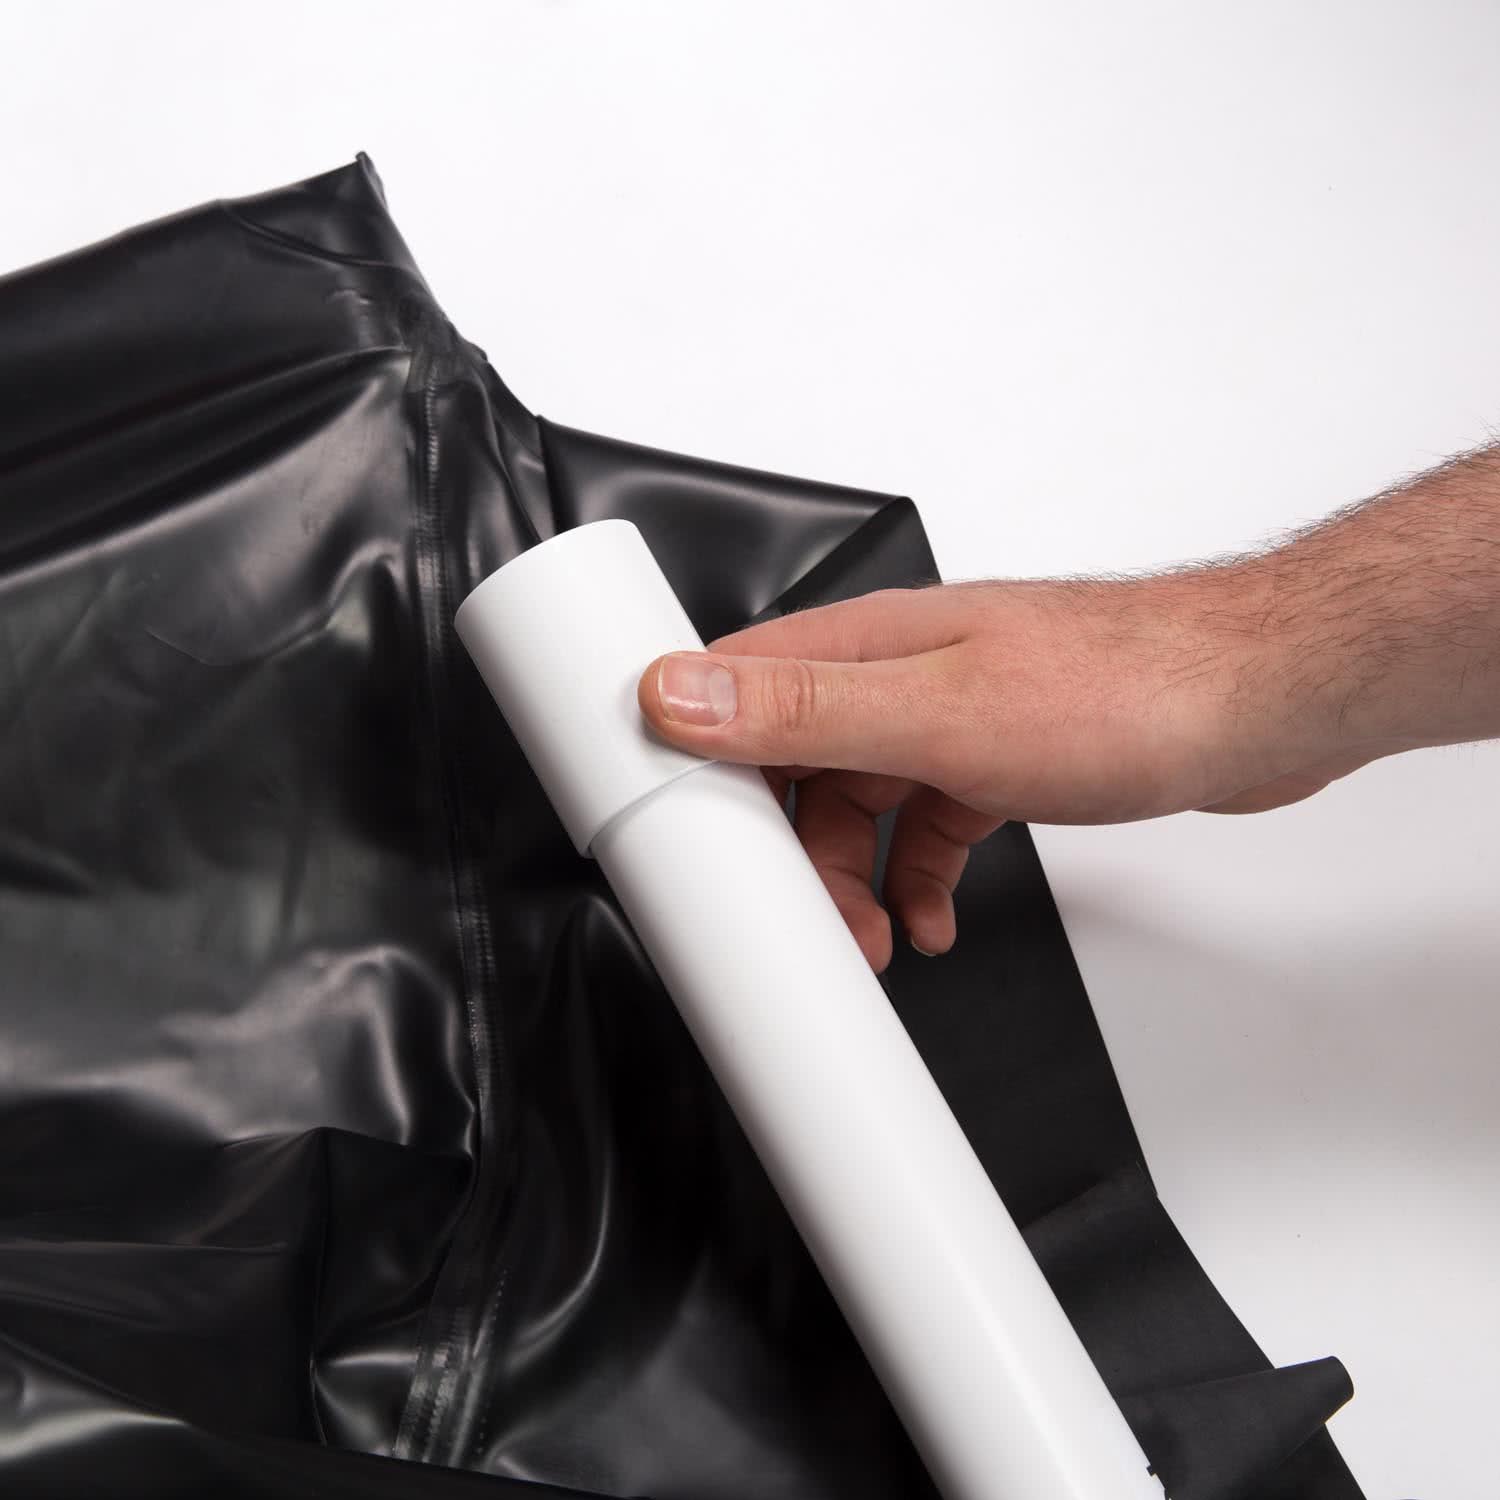
7
Fully insert the side tubes, by pulling on the VacRack and aligning them with its sides, making sure that the corners sit snugly against the corners of the latex.

8
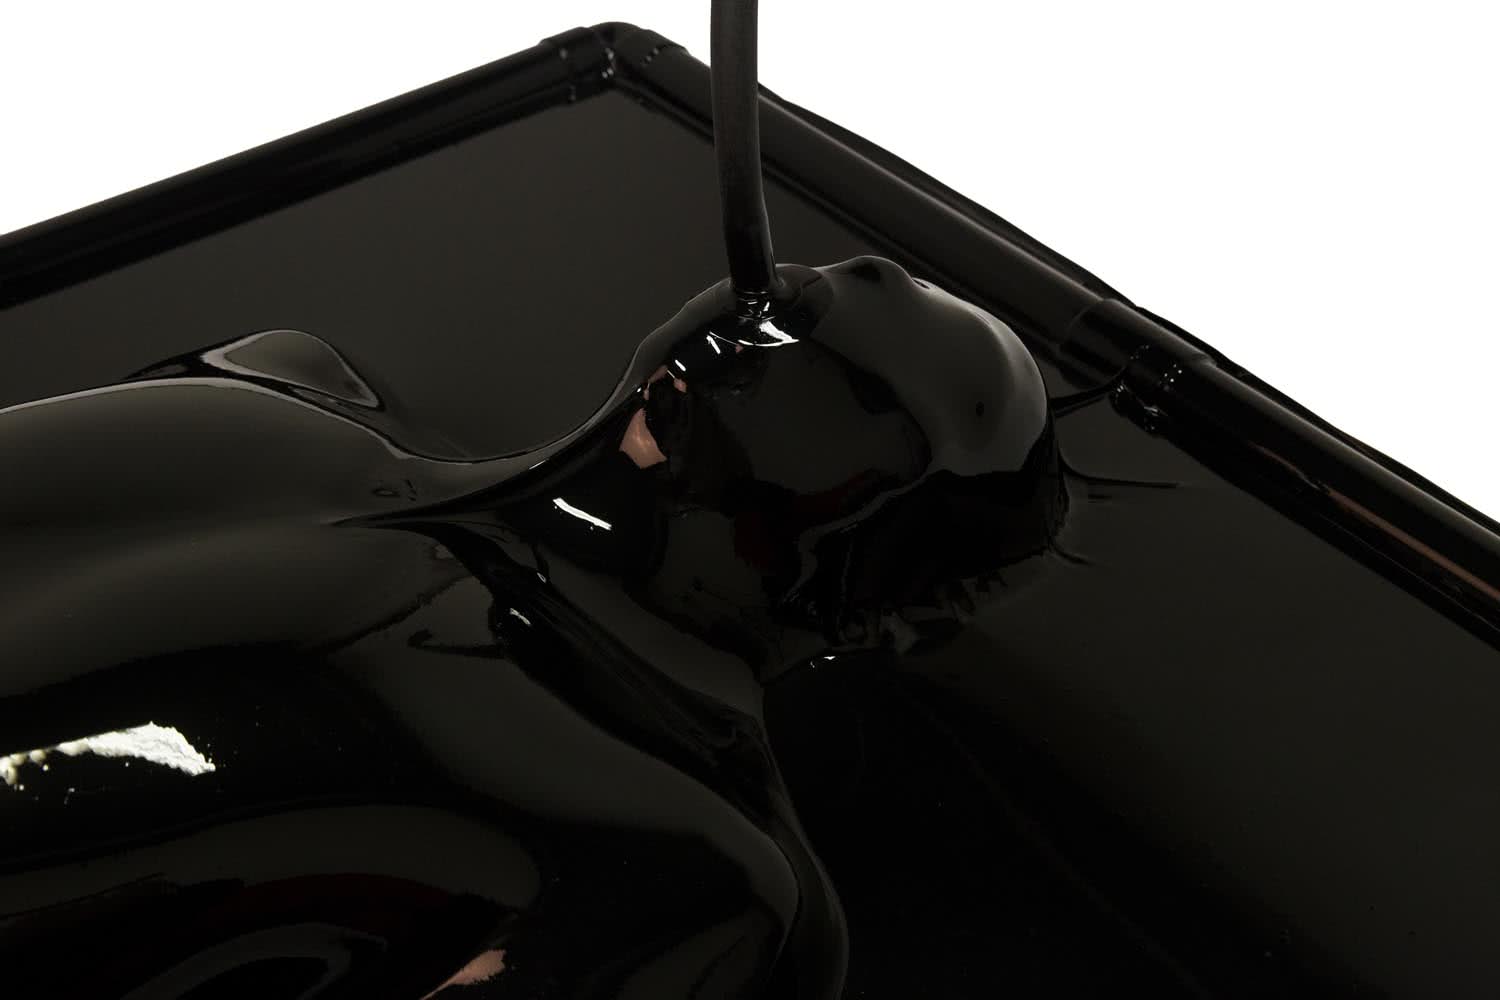
If the VacRack you ordered comes with a Breathing Tube, from the inside, thread the rubber pipe through the opening in the VacRack.


9
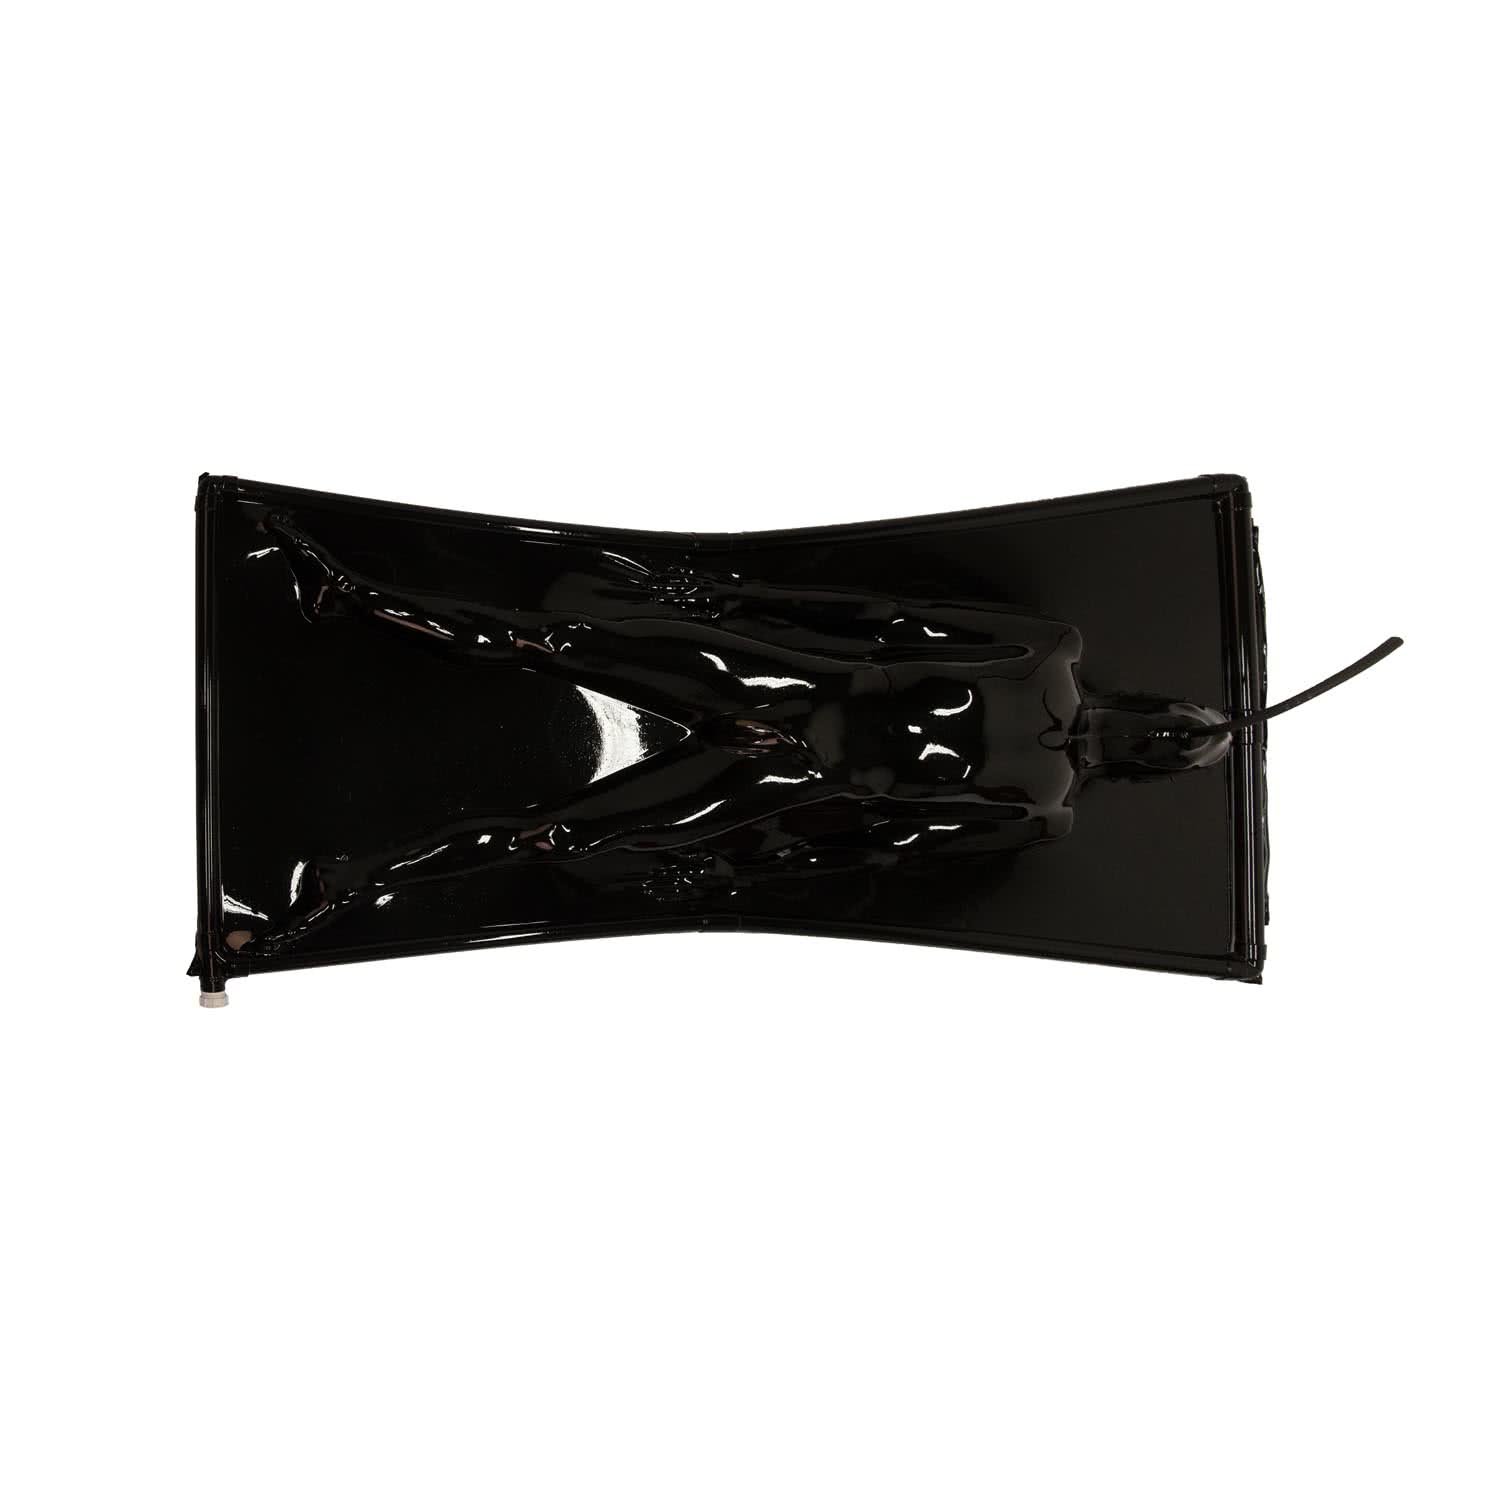
Now it’s time to insert your play partner. Legs first, until fully out of view. Insert the Breathing Tube gag into the mouth and test to make sure they can breathe naturally.


10
Insert the top tubes into the top connectors of the side pipe. Attach a straight connector to one of the top tubes. Grab one tube in each hand, gently push them apart then lock in place through the straight connector. Again, ensure that the vent holes are facing into the VacRack. That’s all the tubing done.


11
Close the zip runners, preferably in the middle.

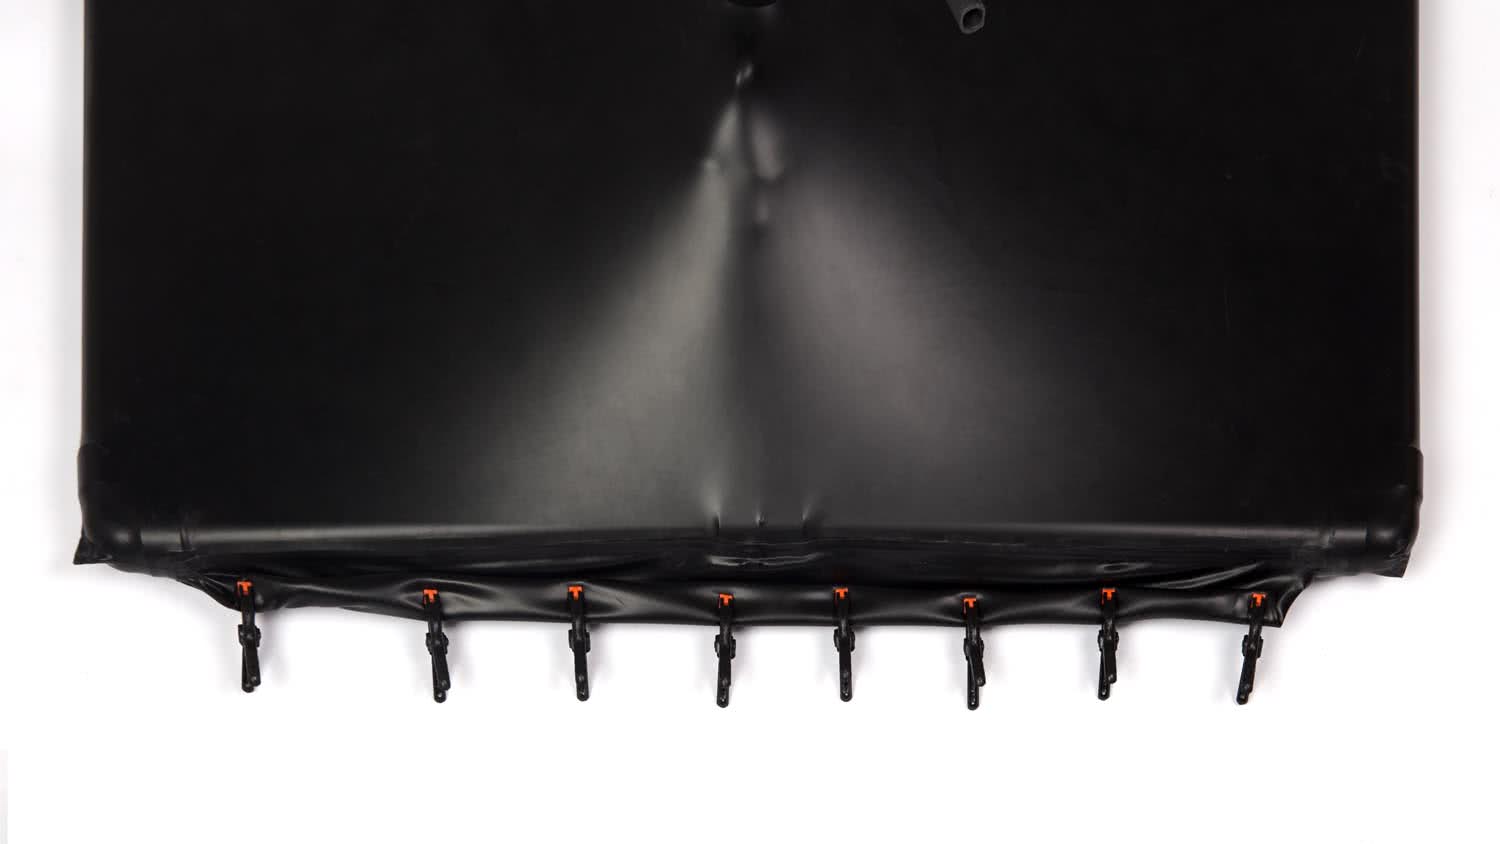
12
Roll the top flaps together to create a seal, then secure in place with clips.

13
Insert the vacuum tube into the valve. We’ve improved our VacRack with a universal valve, so don’t worry if your vacuum cleaner’s pipe is smaller in diameter than the VacRack valve’s tube. It’ll still work.


14
Turn on the vacumm cleaner to deflate the VacRack and watch the outline of your partner become defined. Two options: you can either attach the screw cap, which will maintain the vacuum longer, or you can keep the vacuum cleaner attached for easier top-ups of suction.

15
Your play partner is now securely immobilised and ready.

16
When your play/scene is over, in order to get your partner out of the VacRack, simply undo the flap seal, remove the top tubes and allow them to exit the VacRack.

All done
Now you know how to get your VacRack ready for play. We tried to make it as simple and easy as possible. If something's not 100% clear or you have any questions, do give us a shout at support@regulation.co.uk.


